Help Documents
Step-by-step guides for configuring DDNS on your device.
1Hikvision Camera / NVR
Path: Configuration → Network → Advanced Settings → DDNS
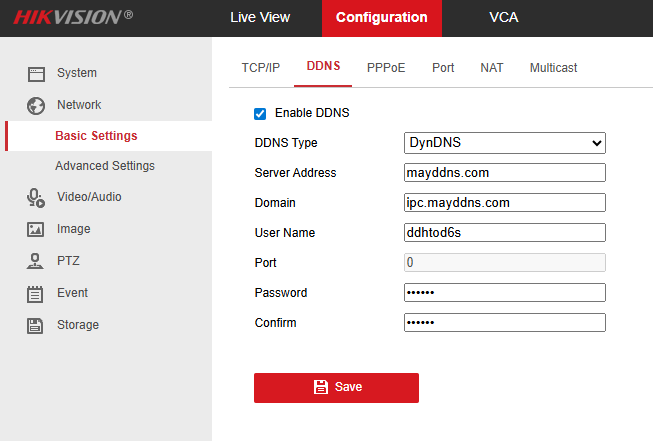
Step 1 — Enable DDNS
Check the Enable DDNS checkbox in the DDNS settings page.
Step 2 — Fill in the fields
- DDNS Type: DynDNS
- Server Address: mayddns.com
- Domain: Your full hostname (e.g.
example.mayddns.com) - Username: Hostname username from your dashboard
- Password: Hostname password from your dashboard
- Confirm Password: Same as above
- Port: 80
Note: After saving, the device will begin sending DNS update requests. Allow up to 5 minutes for the hostname to resolve correctly.
2Dahua Camera / NVR
Path: Setting → Network → DDNS
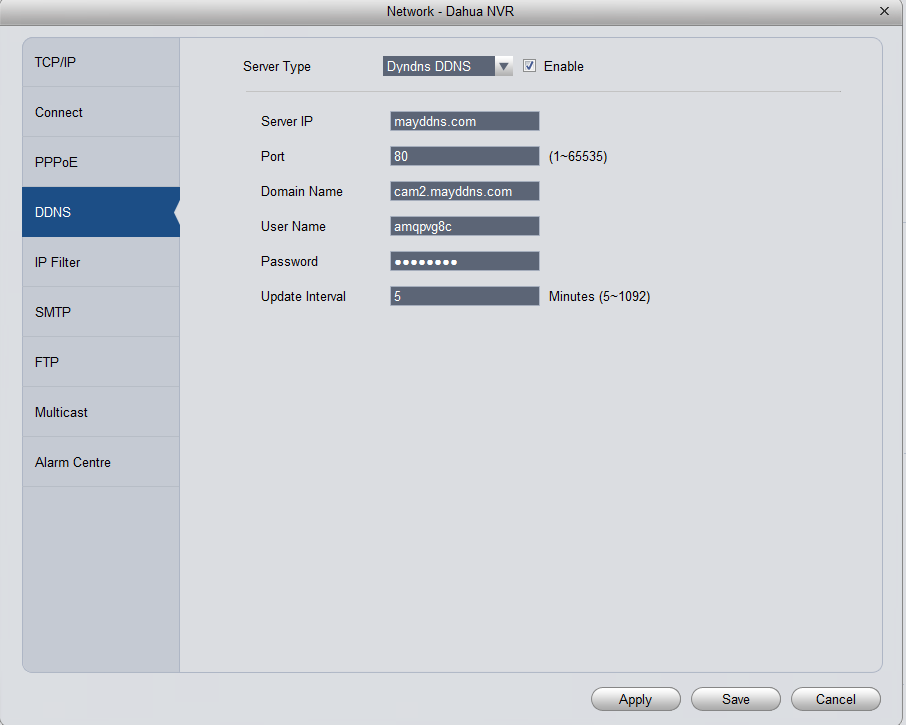
Step 1 — Enable DDNS
Enable DDNS and select NO-IP as the DDNS type.
Step 2 — Fill in the fields
- DDNS Type: NO-IP
- Server IP: mayddns.com
- Domain Name: Your full hostname (e.g.
example.mayddns.com) - Port: 80
- Username: Hostname username from your dashboard
- Password: Hostname password from your dashboard
Note: Save and apply settings. The device will automatically update the DNS record whenever the IP address changes.